Introduction
VPPs have vesting with different cliff and duration based on the moment in time you bought your tokens. The tokens that you have bought are already in your ethereum address, but they are locked. In order to claim any VPP amount that has already vested, we have deployed a vesting controller.
This document is a guide of how to claim vested tokens. The vesting controller can be found here:
https://etherscan.io/address/0xc43f7024de8d6b61e533a2af3c3467d9845e78d6
You will need to use the etherscan interface to interact with the contracts to claim your vested tokens. Any amount that you contribute to the justice staking is counted as locked for vesting purposes.
Approve
In order for the vesting controller to get the tokens from your blocked address and transfer them to another, you, as the owner of the VPPs, have to allow the vesting controller to take the tokens from your contributor address.
1. In order to do that, go to the VPP etherscan page:
https://etherscan.io/address/0x5eeaa2dcb23056f4e8654a349e57ebe5e76b5e6e
2. Go to the “Contract/Write contract” tab, and click “Connect to web3”
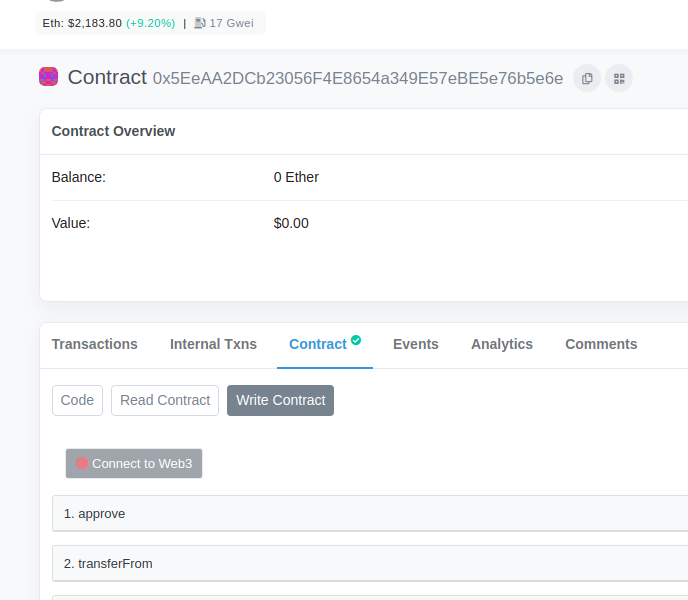
3. Choose your wallet connection method, and when it’s connected the “Connect to Web3” button will be green. You need to use the address that holds locked VPPs for this step.
4. After it, expand the “approve” accordion and set as spender the address of the vesting controller (0xc43F7024DE8d6b61E533a2AF3C3467D9845e78D6 ) and as value the amount of tokens that you have locked with 18 zeros after that, for example, 1000000000000000000000000 for 1 million VPPs.

5. Click “Write”, and send the transaction with your wallet.
You’ll only need to do this once, since you’ve allowed the vesting controller to transfer all the amount that you have locked. However, if the claimTo operation fails, it can be because the vesting controller has spent all allowance. In that case, perform this step again.
Claim
Whenever you want to claim any amount that you’ve already vested, you can perform the claimTo operation. For that you’ll need another ethereum address you control that is not the one you bought the tokens with, so it’s not locked. Go to the vesting controller etherscan page:
https://etherscan.io/address/0xc43f7024de8d6b61e533a2af3c3467d9845e78d6
1. Go to the “Contract/Write contract” tab, and click “Connect to web3”

2. Choose your wallet connection method, and when it’s connected the “Connect to Web3” button will be green. You need to use the address that holds locked VPPs for this step.
3. After it, expand the “claimTo” accordion and set the recipient to another ethereum address you control that will receive the VPP tokens

4. Click “Write”, and send the transaction with your wallet. The recipient address will receive the tokens that are already vested when you claim.
Warning: Set as recipient a wallet address that you control. If you set an exchange address or any address that you don’t control you will lose your tokens, as they will be sent to that address.
If you run into any issues or have any questions please email support@virtue.poker
Thank you,
Virtue Poker Team